
How to make a beautiful personal website quickly
Using Jekyll and Github Pages to create and host a great looking website, for free.
Before you begin:
This guide assumes some basic Ruby, HTML/CSS, and git experience. It will still be possible to follow without, but it may require a bit of extra research. Start by following the instructions under Set Up Your Environment. If you get stuck, I have added some articles that I found helpful in the further reading below.
tl;dr: Jekyll is a Ruby gem that allows you to create custom static websites. It is simple and customizable, offering a wide variety of themes for blogs, personal websites, portfolios, and more. You can use Jekyll in conjunction with Github Pages to create and host your own website for free, fast.
Creating your personal website can often be a daunting task. There are a ton of options for a variety of skill levels, from using Wix or Wordpress templates to coding one from scratch. Building from scratch gives you the most control over the end product, while using a template can get you up and running quickly with the lowest learning curve. If you have a little bit of coding experience, something in the middle might actually be the best option. One way to create a simple, beautiful websites quickly is to use Jekyll, and then deploy it for free on GitHub Pages. Jekyll is a ruby gem which is great for creating personal websites and blogs, and is what I used to make my own blogging site. It offers a variety of themes, is extremely customizable, and most importantly, it is fast! In this article I will walk you through creating and deploying your own personal website using Jekyll and Github Pages.
Set up your environment (optional)
note: I specify terminal commands in this article with a $. If you are copying these commands directly, only copy the text following the $.
- Download a text editor if you don’t already have one. I use Atom, but a lot of people really love Visual Studio Code as well.
- Create a GitHub account. Git is a version control software
- Install Homebrew
$ /usr/bin/ruby -e "$(curl -fsSL https://raw.githubusercontent.com/Homebrew/install/master/install)" - Install Ruby and Bundler
$ brew install ruby
$ gem install bundler
Make a new Jekyll project
Jekyll is a Ruby gem, which is essentially a library of code created by a group of dedicated programmers and released, for free, to us. It is open source, which means that is it maintained by more amazing programmers who volunteer their time to keep great software free and accessible.
Getting started with Jekyll is super simple. Before making a custom site, it can be helpful make a sample site first. To do that, enter the following commands in your terminal:
$ cd ..

$ mkdir jekyll-projects

$ cd jekyll-projects

$ gem install bundler jekyll

$ jekyll new my-awesome-site

$ cd my-awesome-site

$ bundle exec jekyll serve
Now, open up your web browser and go to http://localhost:4000. TaDa! You have a website up and running! Take a browse through this website to familiarize yourself with the basic Jekyll theme.
Make a custom Jekyll project
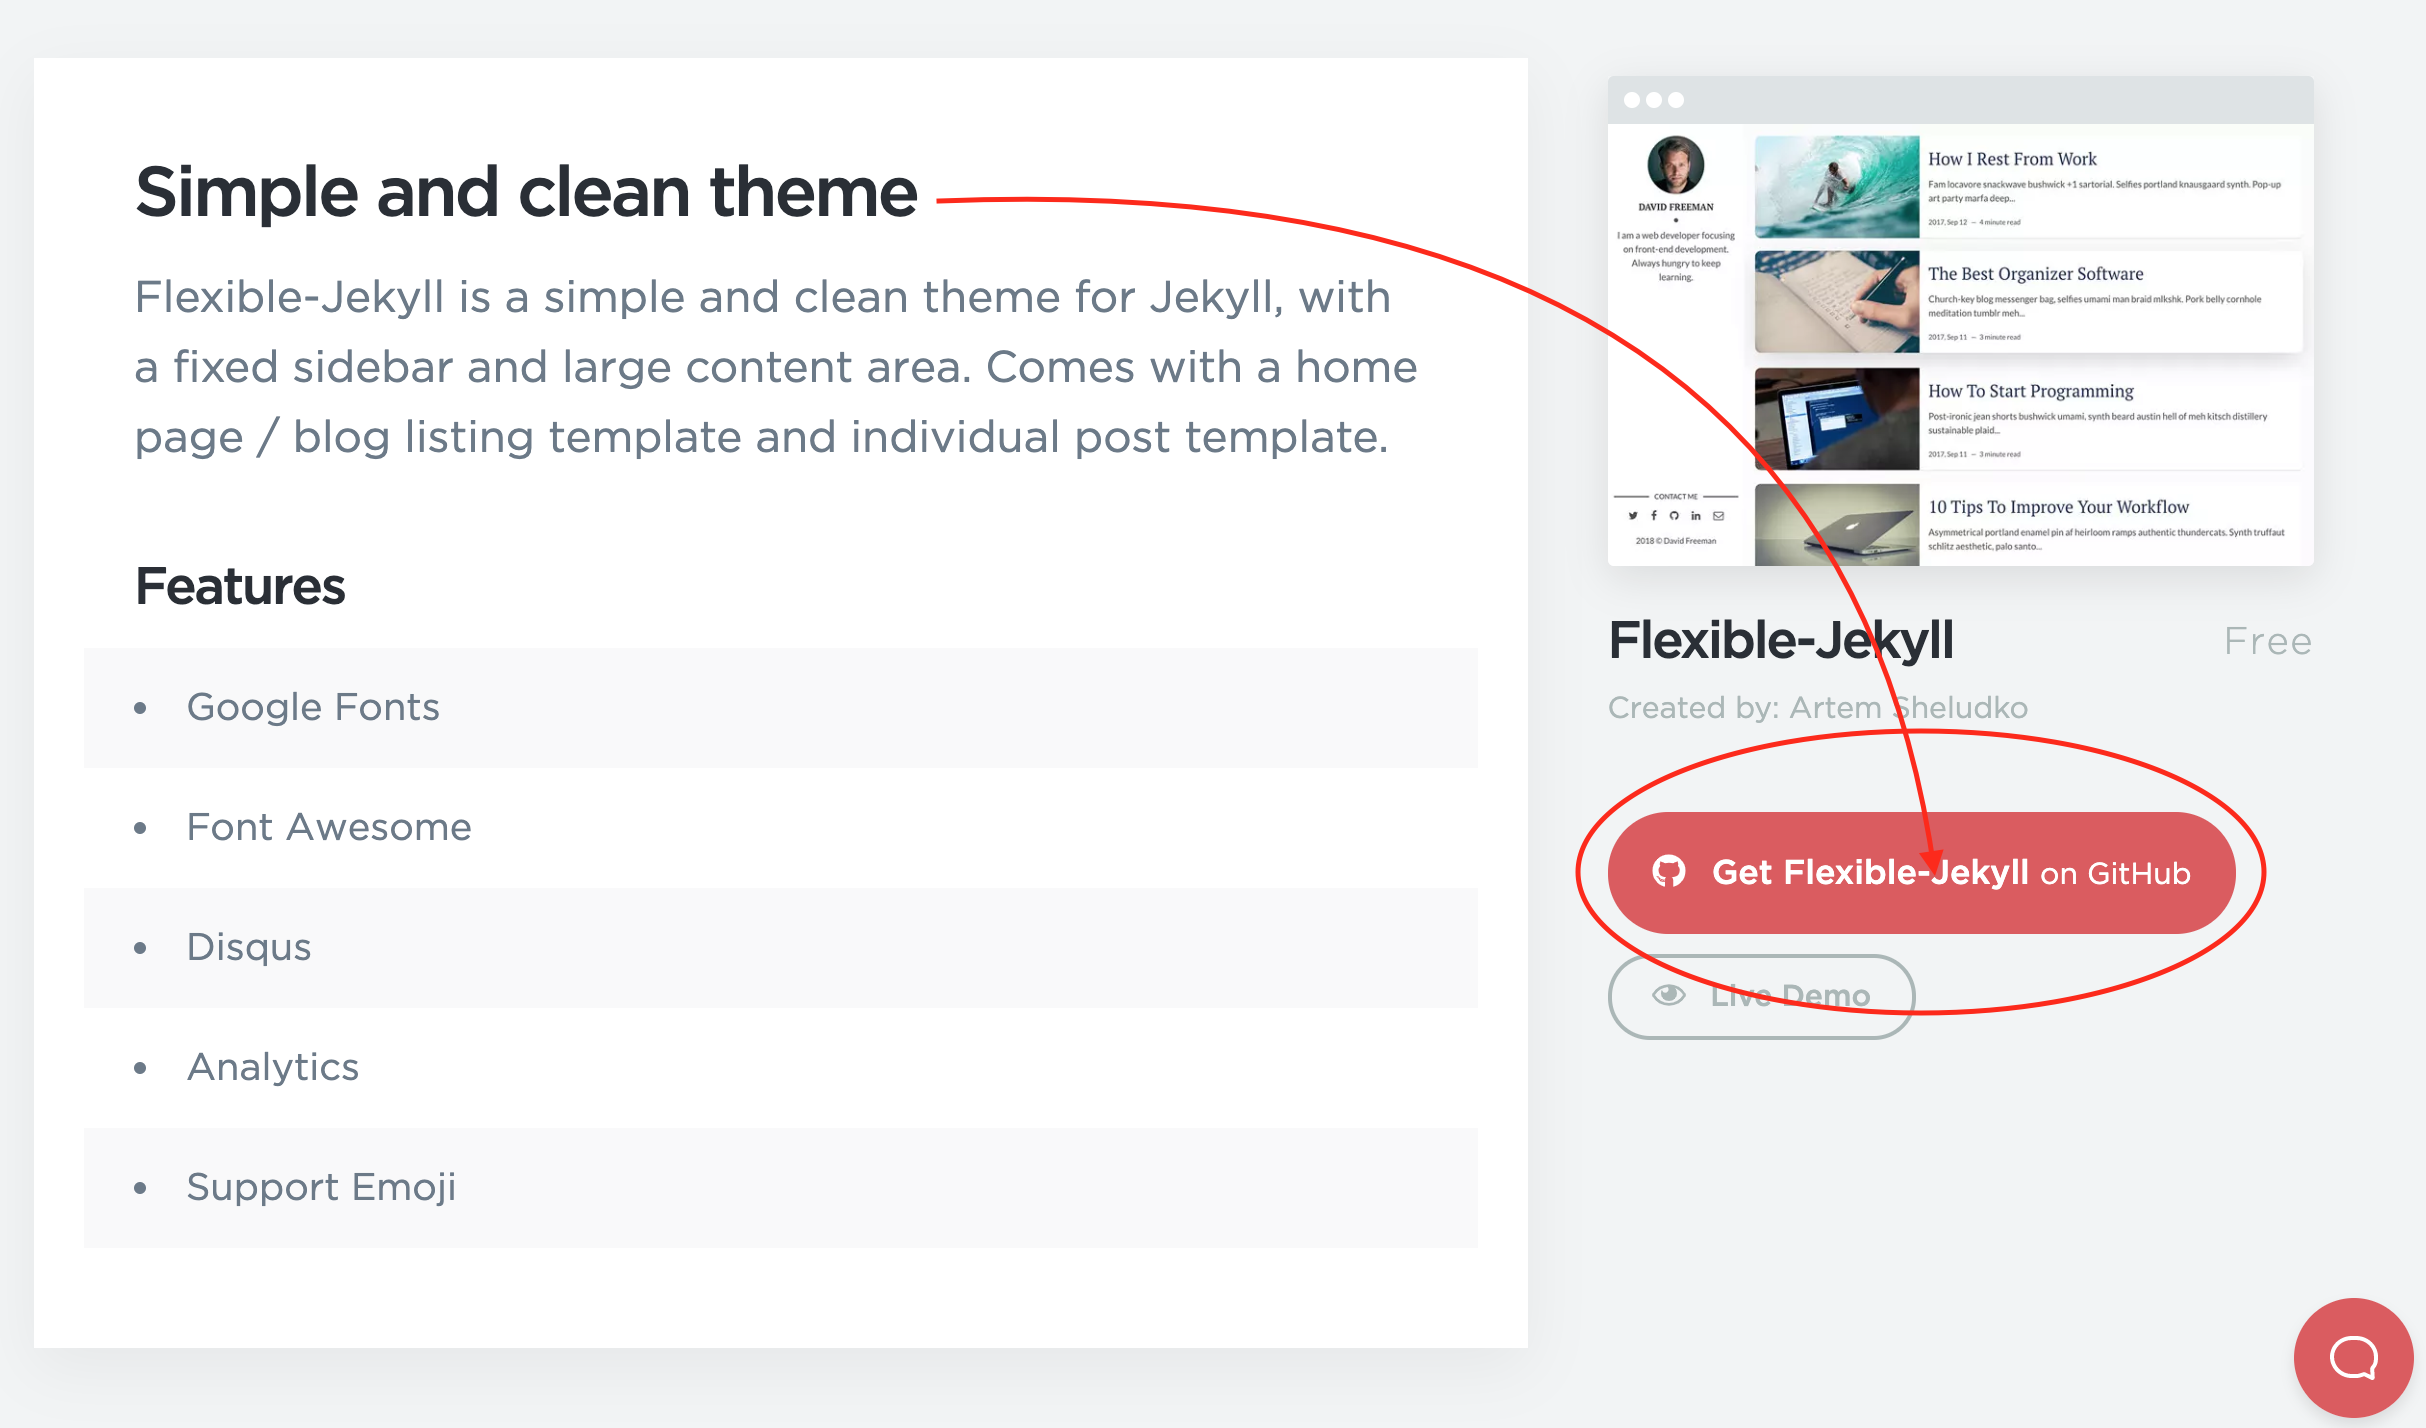
Now that you have created your first Jekyll site, you will want to take a look at the themes and decide which one you want to use for your own. You can find all of the themes available at jekyllthemes.io. There is a wide variety of beautiful free and paid themes designed for blogs, portfolios, landing pages, and more. Once you have decided on your theme, it is time to dive in.
Step 1: Open the theme on your local computer
- Navigate the the GitHub page for the theme of your choice (there should be a link in the description):
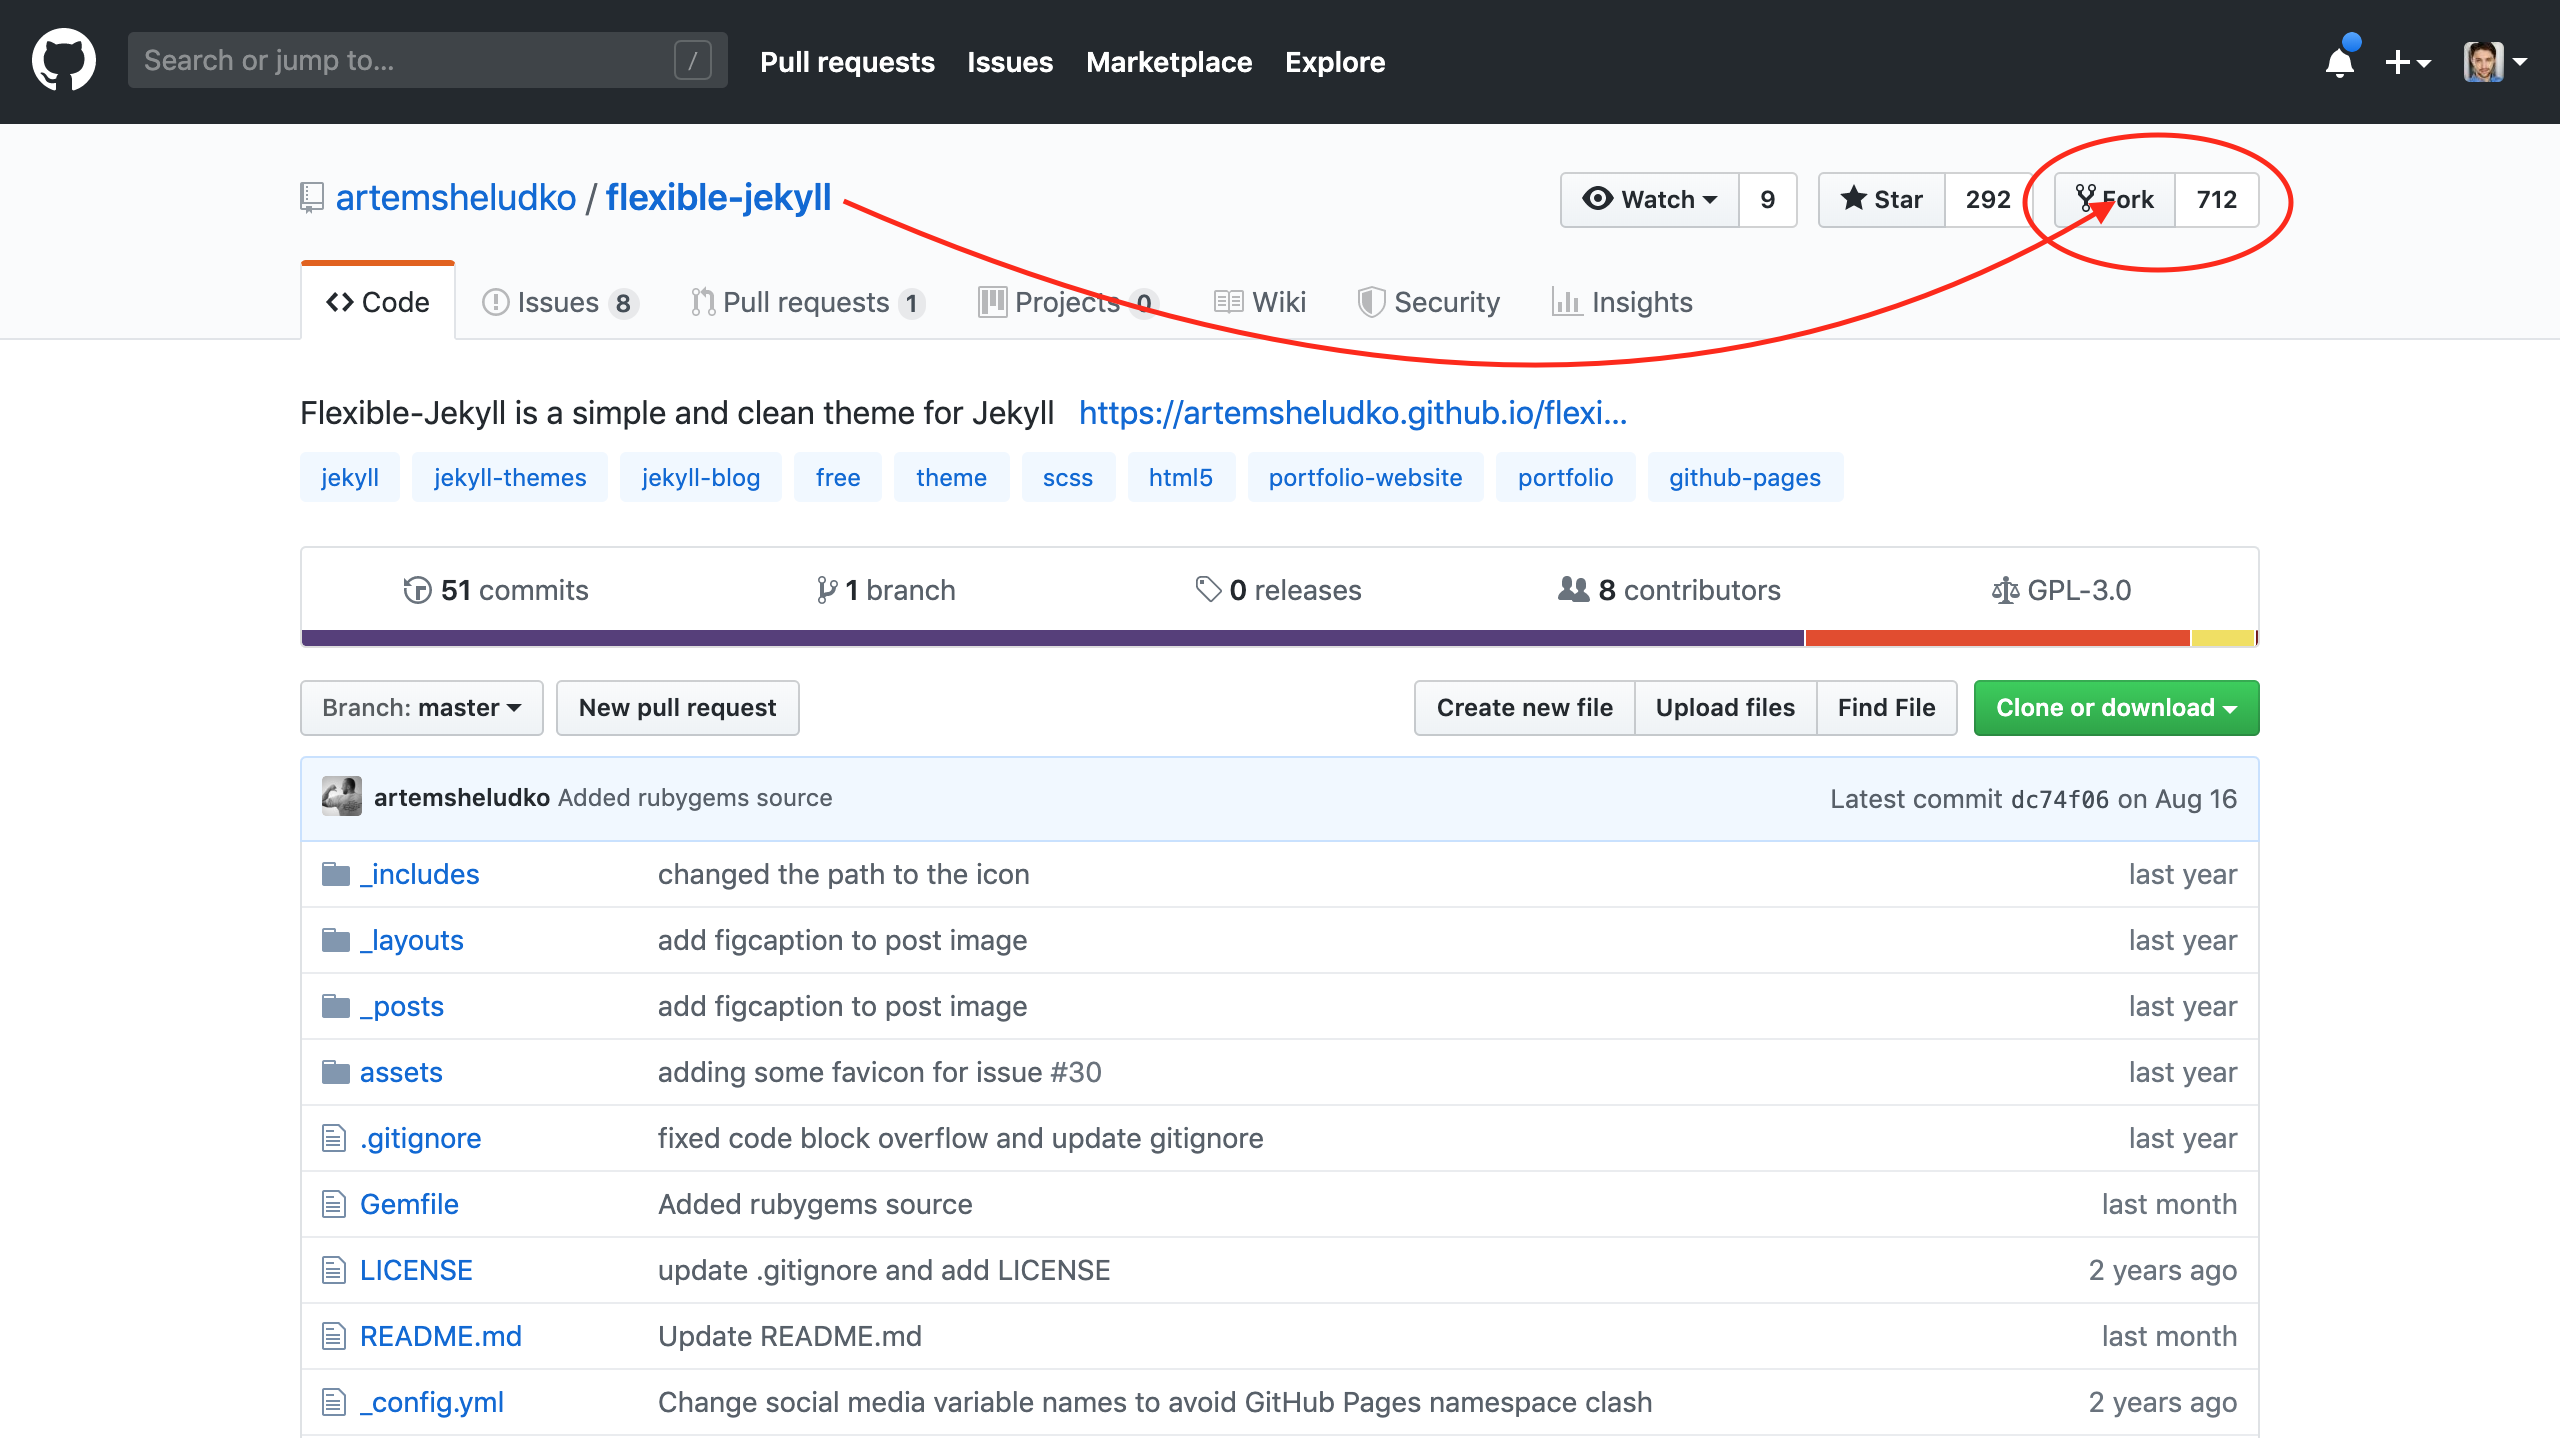
- Fork the repository:
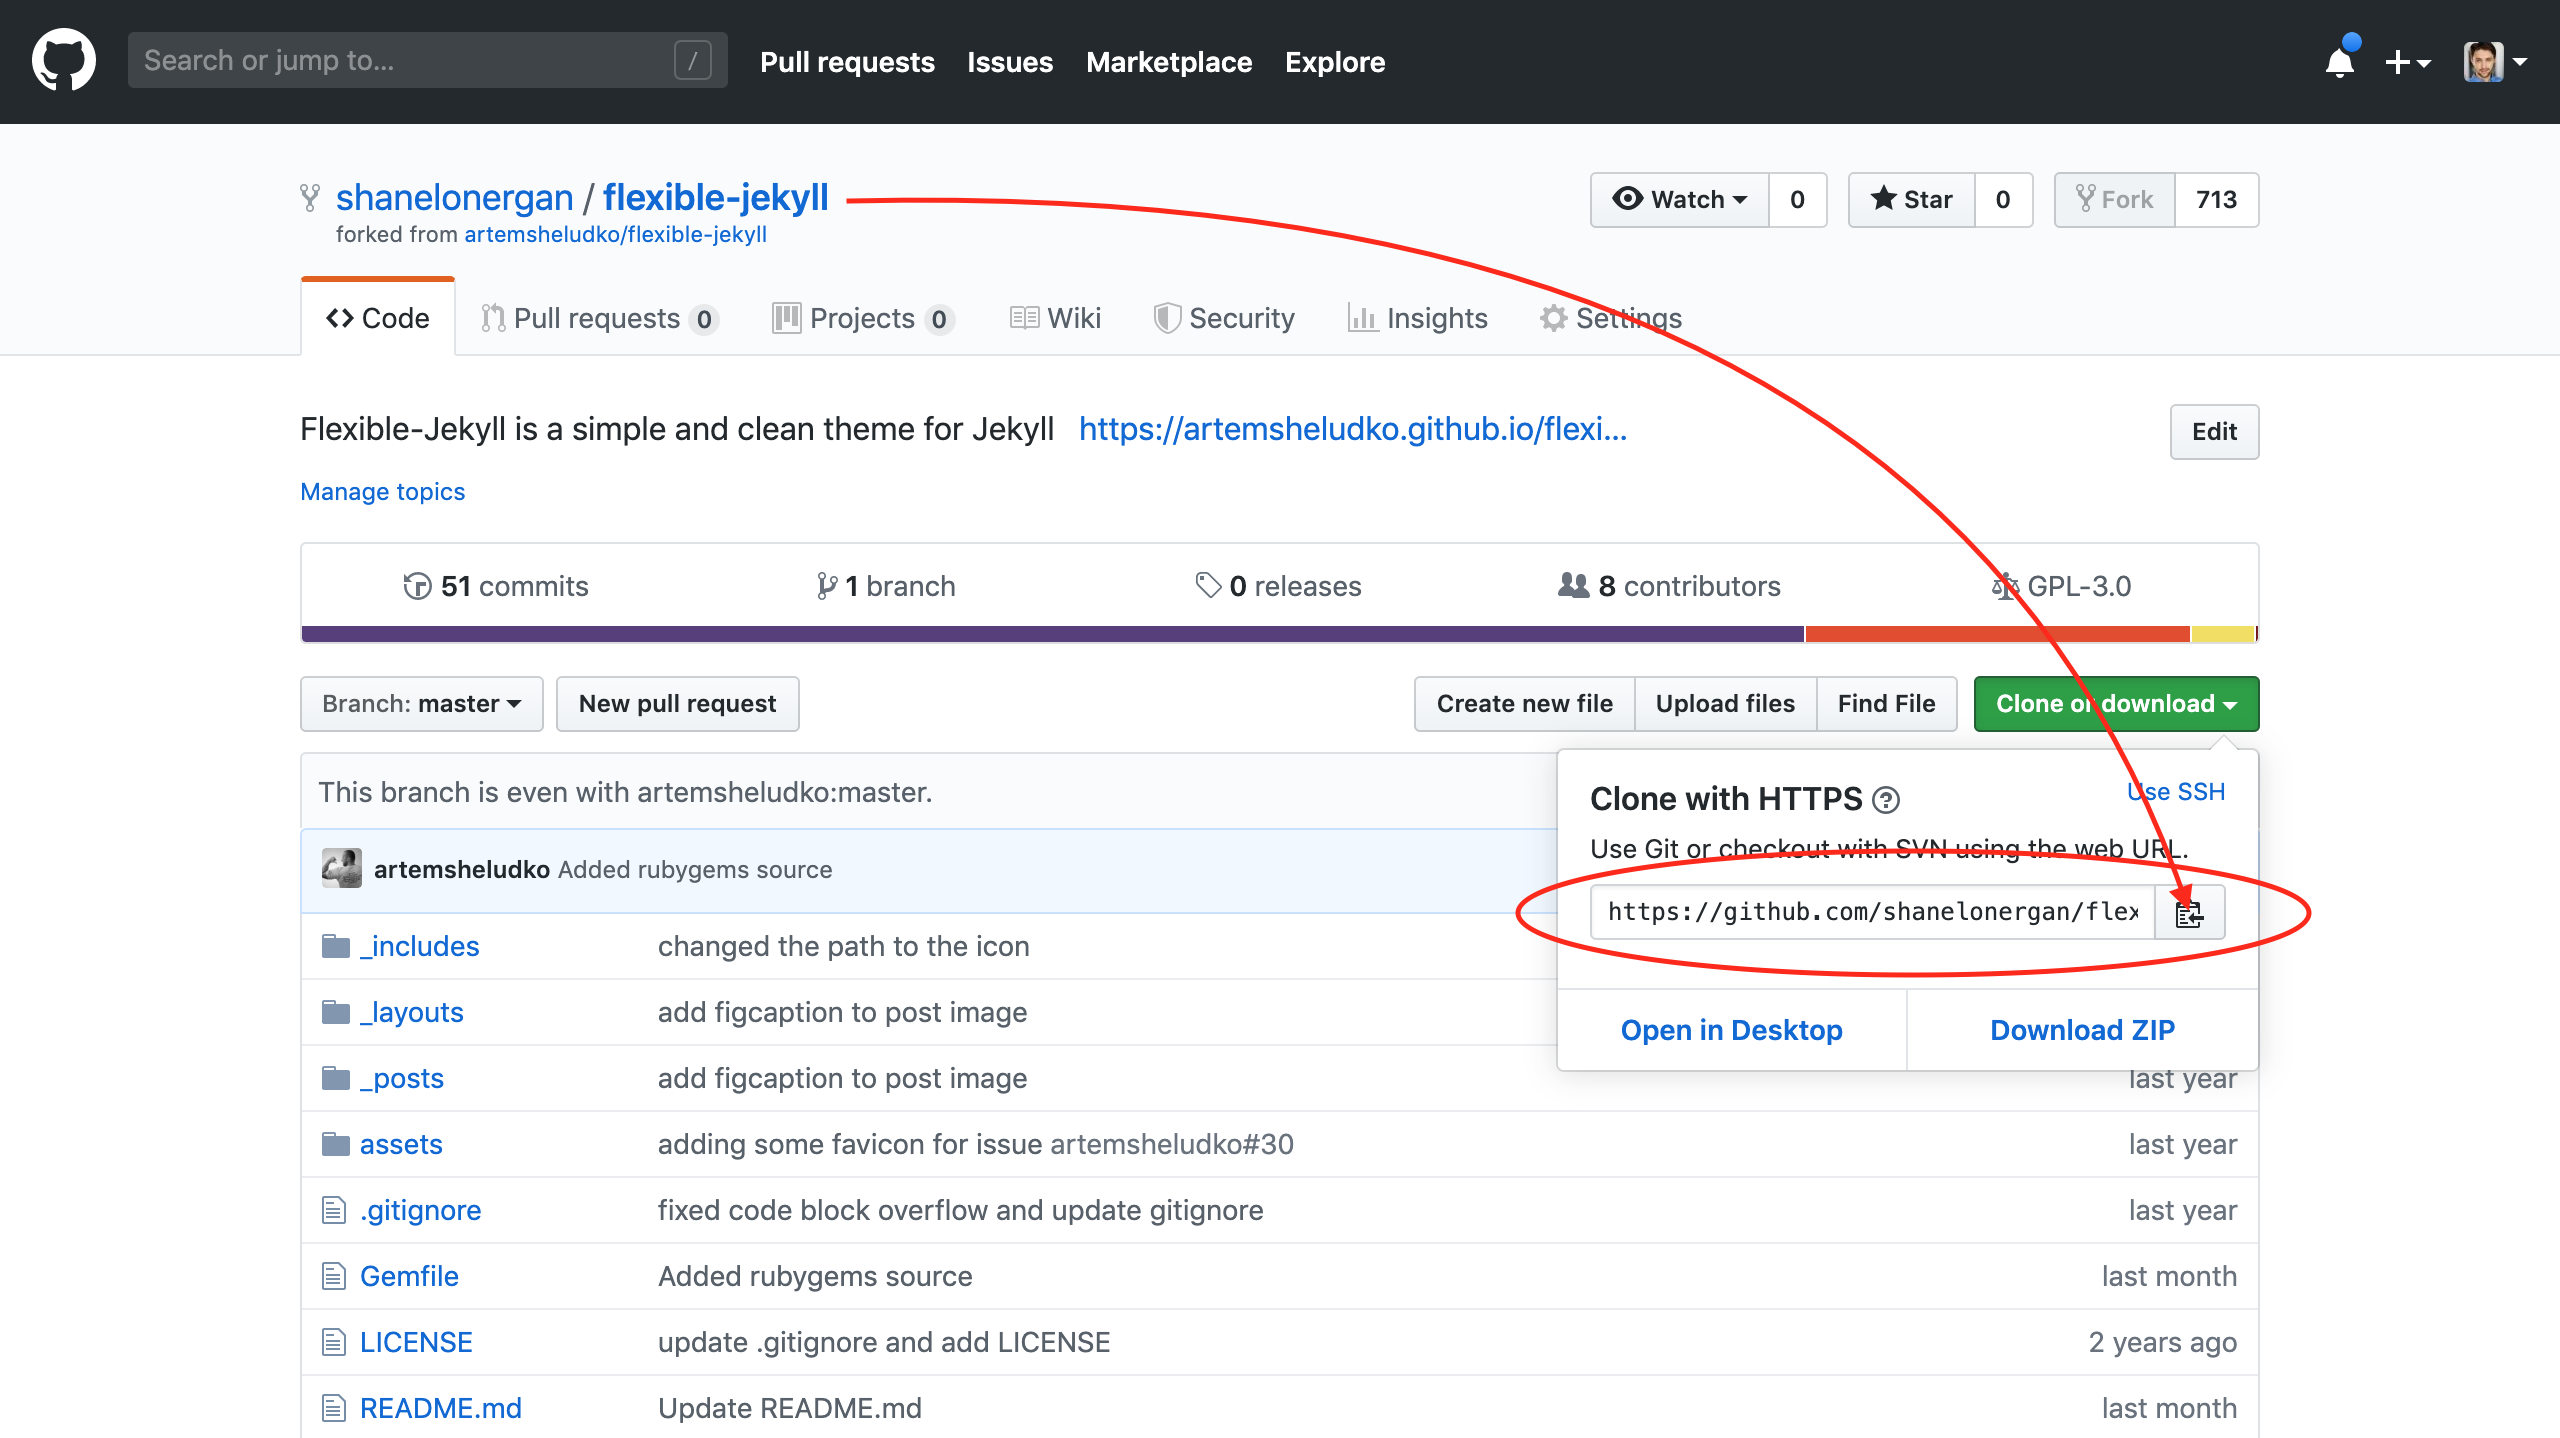
- Copy the clone link:
- Clone the repo into your local folder:
$ cd .. $ cd jekyll-projects $ git clone "paste-your-link-here" - Navigate into the project folder:
$ cd theme-name-here - Open it in your editor (if using VS Code, this replace ‘atom’ with ‘code’):
$ atom . - Run your server:
$ jekyll serveNow you can browse your template on http://localhost:4000.
Step 2: Customize the project with your own information
In your project directory, you should see a file called _config.yml. Click on that file to open it, and you will see a document with all of the stock information in it. You can replace this placeholder text with all of your personal information, and it will show up on your web page. If you want to add any images, drag and drop them into the img folder. Then just provide the file name in the config file, and you are good to go!
If you have HTML/CSS skills, you can also dive into the _layouts or css folders to customize even further. For example, I wanted to add a subtitle to my posts and wasn’t satisfied with how it looked in markdown, so I added some custom HTML.
Step 3: Add your content
If you are creating a personal blog, there should be a couple sample posts. To create a new post, create a new file in the _posts folder. You will have to write your posts in markdown, which might be new. However, don’t despair! Markdown is actually a fantastic and simple way to create great looking text files. Check out the Markdown Cheat Sheet to get started. Next, copy and paste the header from one of the sample posts, and update it with your post’s info. Now all that is left is the the easy part: write your post!
Host your website on GitHub Pages
So, you have finished writing your posts and adding all of your content, and your website looks fantastic in your local browser. Congratulations! That is no small feat. Now it is time to get it up and running for the world to see. Hosting your website can seem like a complicated process, but GitHub makes it super easy.
Step 1: Rename your project
In order for a project to be hosted a a personal site on GitHub pages, it needs to follow a specific title syntax: username.github.io, where username is your GitHub username. You can change the title directly from your text editor by control-clicking on the project folder and selecting rename.
Step 2: Commit and push your changes to Github
Follow the following steps if you are not already familiar with git to save this version of your project to your GitHub Profile:
$ git add .
$ git commit -m "updated my personal website"
$ git push -u origin master
Step 3: Check out your live website!
Go to www.username.github.io to view your website. Congratulations! You have created and hosted your own personal website. That is no easy feat, so be proud of yourself, and send that link to all your friends!
There is a ton more you can do to customize your website once you are finished. You can add a custom url, custom error pages and more! Check out the GitHub pages documentation in the references below to learn more.
References
Further Reading
- Atom
- How to Install Homebrew on Mac
- Installing Ruby
- What is a Gem?
- What is Git?
- Markdown Cheat Sheet